Using SOAP API integration to modernise legacy systems
The need to squeeze extra value from outdated software is a challenge we see often as systems integration experts. And with flexible technologies like Azure Integration Services, this modernisation is faster and more cost-effective than ever. In this article we’re going to focus on using Microsoft Azure to achieve SOAP API integration.
While SOAP was once the standard enterprise API format, it has now been largely superseded by REST APIs. But it isn’t always practical to ditch a SOAP-based system and start afresh. That’s where SOAP API integration comes in — with Azure, you can liberate that SOAP-based data for use in the cloud.
Why use Azure for SOAP API integration?
As an experienced systems integrator and Microsoft Partner, we’ve delivered Azure-based integration solutions for dozens of UK clients. Azure has the following selling points, particularly for businesses that prefer an approach with low entry costs:
- faster development with Azure’s low-code integration tools
- turn your business logic into easily reusable custom APIs
- only pay for the number of actions triggered in your Azure instance
For an in-depth view of what our experts can achieve with Azure, see these recent case studies:
Developer’s guide
Building a custom connector for SOAP integration
For our integration of an on-premise system’s SOAP APIs with Azure, we’ll need three elements:
- an Azure Logic App
- an Azure custom connector
- an on-premises data gateway
While Azure doesn’t have a standard SOAP connector, our custom connector takes only a few minutes to set up. And the simple “designer” interface removes a lot of the coding complexity.
So let’s get started building our SOAP API integration with an Azure Logic App custom connector.
We’re going to say you already have a Logic App set up that handles your order process. Now you want to bring in relevant order data from an on-premises system that uses SOAP APIs.
First you’ll need to search “custom connector” and provision it in the Azure portal, which takes a few clicks. Then you’ll need to choose SOAP as the API endpoint and upload your WSDL file.

Next give your custom connector a name, an icon, and a background colour for easy recognition.
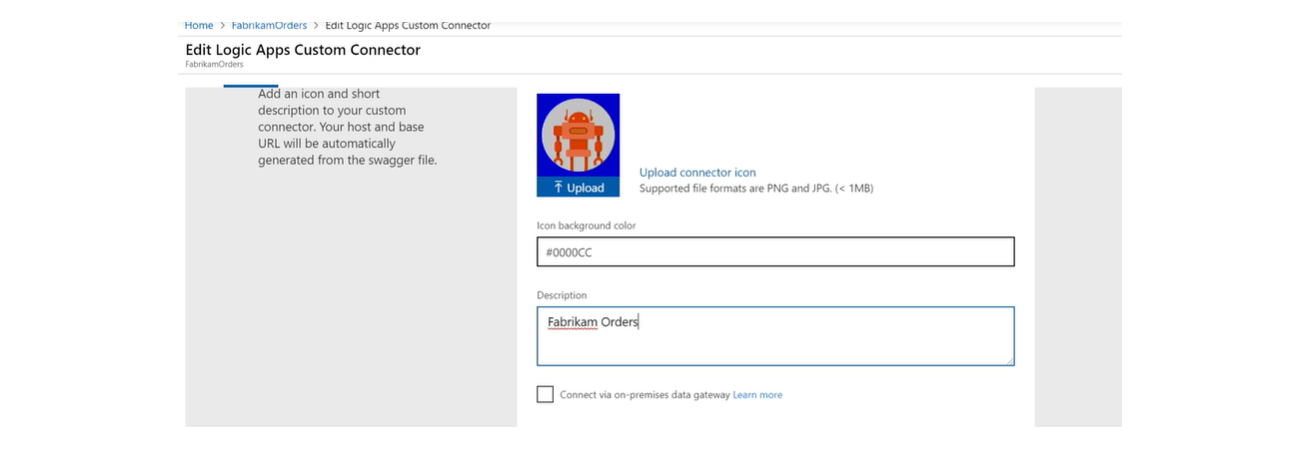
At this stage you can add an authentication type, such as OAuth. Or if not required, you can skip this step.

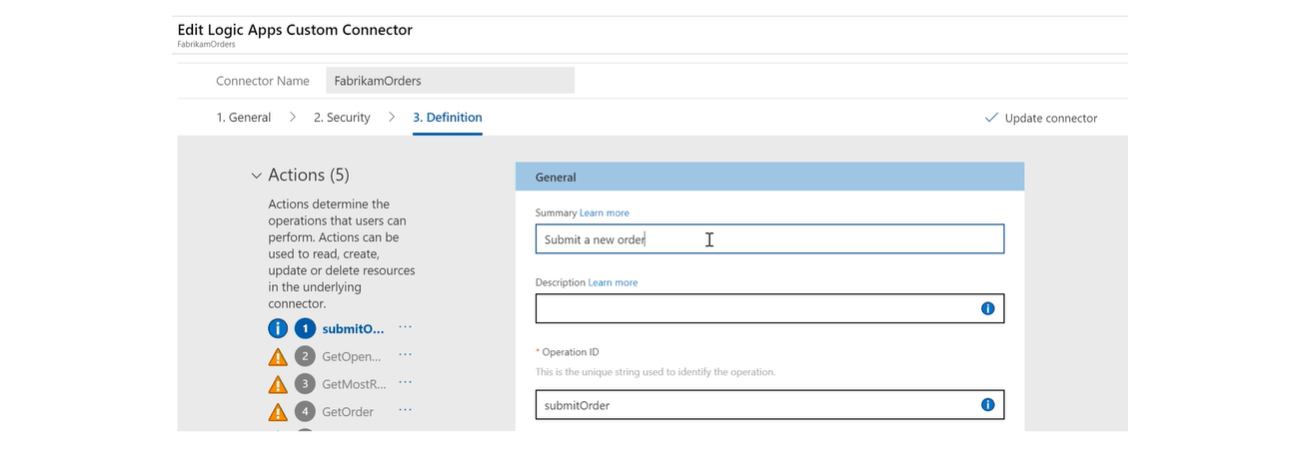
Now you have the chance to name the actions that you uploaded with your WSDL file.
Return to your Logic App and add an action where you want the SOAP API to interact with your app.
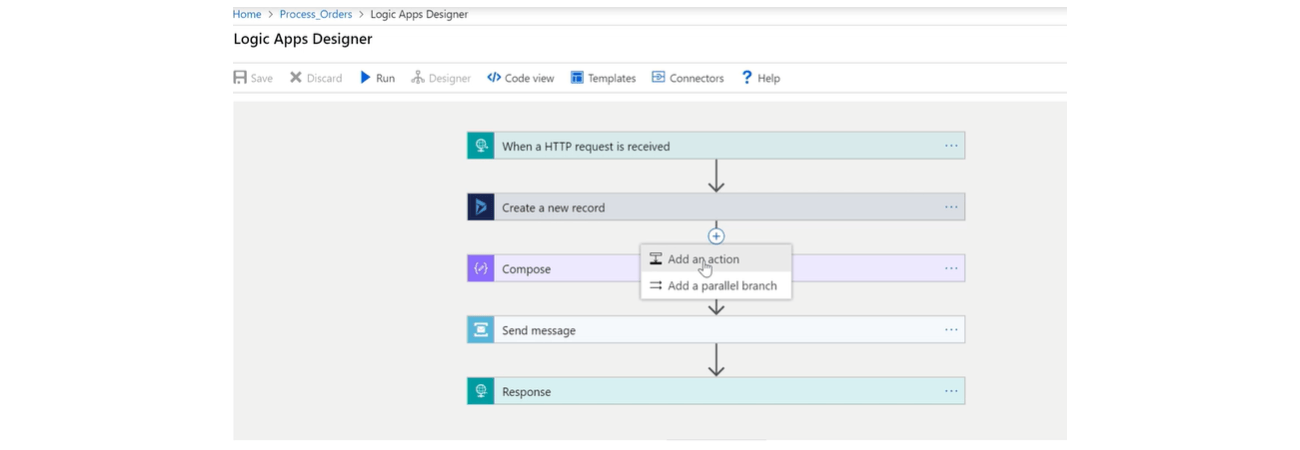
Search for your custom connector and select it.

Select which of the connector’s actions you want to trigger here.

Finally, you can use logic such as a For each loop to perform the custom connector’s action on data flowing through your Logic App.
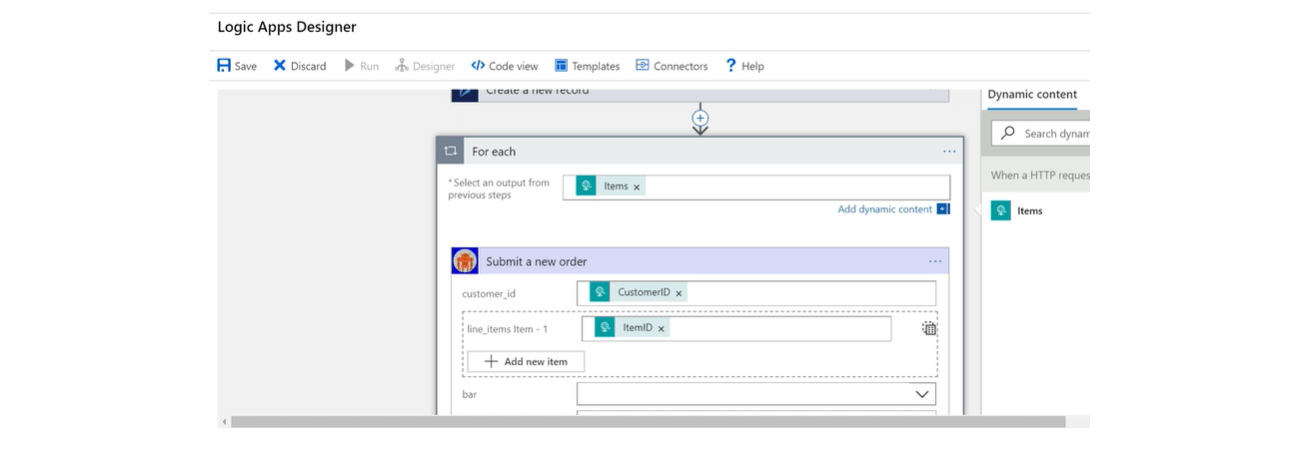
And you have now successfully created a SOAP API integration with Azure Integration Services.
